Powered by Blogger.

Ink.Stamp.Share January Blog Hop - Spring/Summer Catalogue...


Good morning and welcome to my blog.  Today I am joining in with the Ink.Stamp.Share Blog Hop and this month we are celebrating all that's new in the Spring/Summer Occasions Catalogue.  You may have joined me from Cindy who I am sure had some amazing projects for you. 

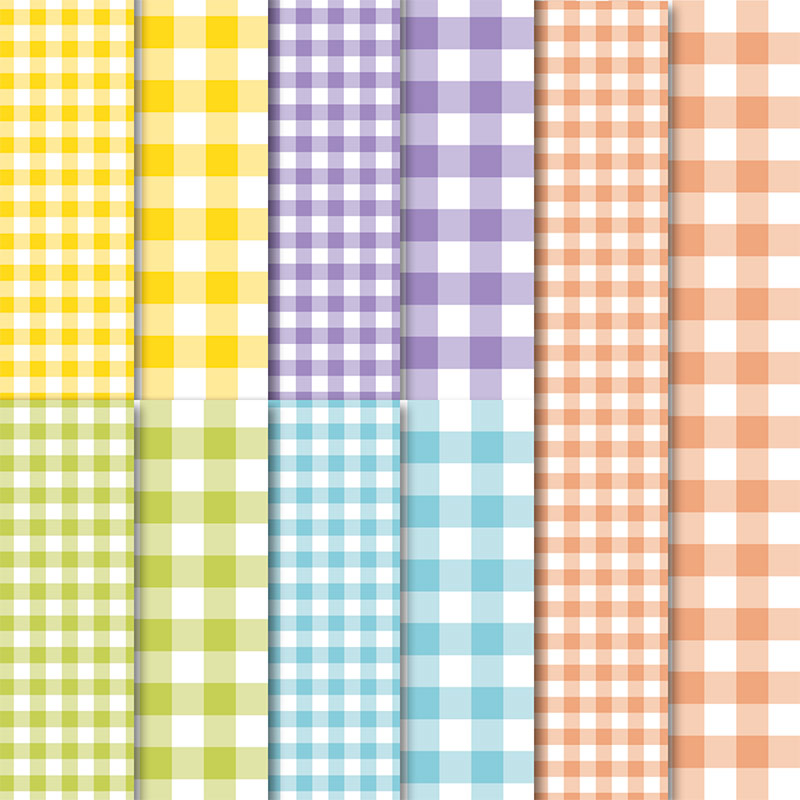
I have chosen to highlight the beautiful Gingham Gala Suite.  This has been such a hit this year with lots of co-ordinating products appearing in the Sale-a-Bration brochure.  I am actually holding a Butterfly Gala class today highlighting these amazing projects so pop back next week to see what we got up to.

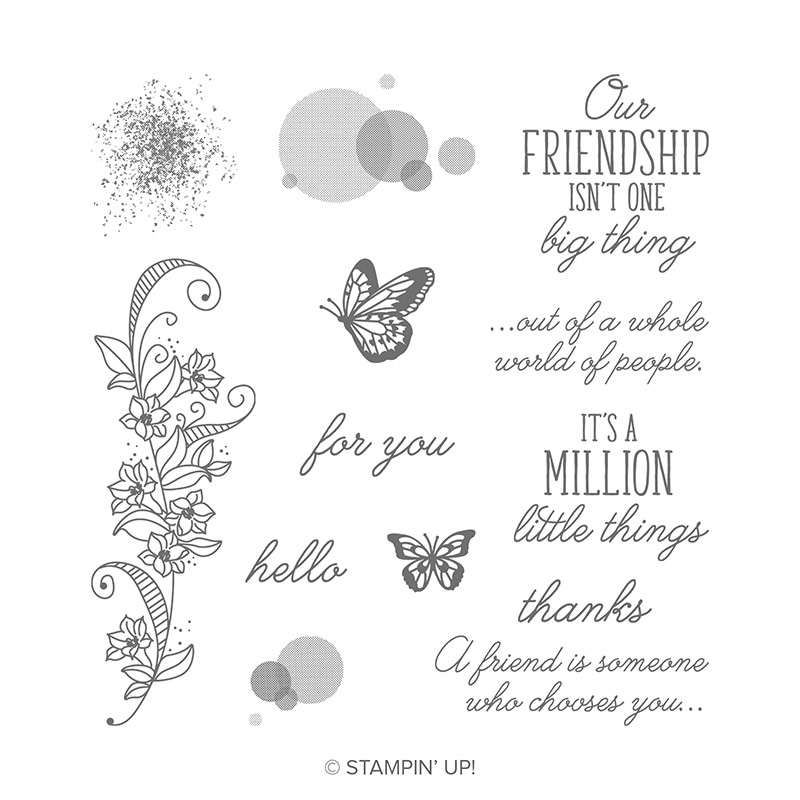
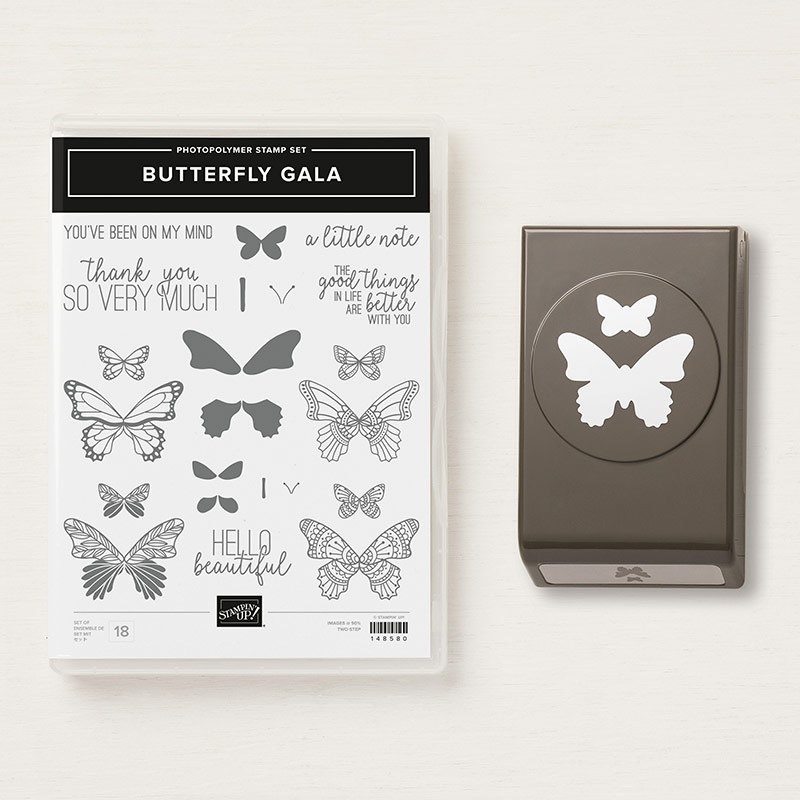
The Butterfly Gala stamp set has lots of amazing butterflies and a co-ordinating punch which makes it quick and simple to create beautiful cards.  The Beauty Abounds co-ordinates beautifully with Bokeh dots and some lovely greetings.

Here are my cards...


I hope you have enjoyed hopping with me today and I am now going to pass you on to Deb.

Happy Stampin'

Jo
x

https://flyingstamper.blogspot.com/2019/01/ink-stamp-share-blog-hop-butterfly-gala.html


January Roll Call


Table built using Product Table Builder by The Crafty Owl - Independent Stampin' Up! Demonstrator.

Ink & Share Scrapbook Hop - January 2019 - Celebration...


Good morning and welcome to the January Ink & Share Scrapbook Hop.

Today we have been tasked with the theme of Celebration.

We recently had a family wedding, we have a very small family so this is a big Celebration for our family.  My niece married her childhood sweetheart on 30 November 2018.  It was a long time in the planning but everything was perfect on the day.  It was a very emotional day for us all as only three weeks before my mum, the bride's nan, sadly passed away.  We were all so grateful that mum had been able to see Katie in her dress before she passed away and had bought her headdress for her.  She would have been so proud.


The picture is of the happy couple signing the register.  The boys are my niece's son, on the right, and his cousin on the left.  I loved this picture it looks like old mates just catching up on life.  The truth is they had been running around all day and were taking a breather!


I have used the amazing Be Mine Stitched Framelits which are part of the All My Love Suite.  This set is so versatile for lots of occasions and so very pretty.


I am going to gift this page to my niece and have placed it in a frame.


I hope you have enjoyed my project today and I am now going to pass you on to Shirley who I am sure has an amazing project for you today.

https://superawesomestamper.com/2019/01/22/ink-and-share-scrapbook-blog-hop-5/

Happy Scrappin'

Jo
x


January Roll Call


Stationery Carousel Class by Post...


We are so excited to share our first Class by Post to make this Stationery Carousel, all kits will post week commencing 18th February.
Currently we are only posting within the UK,
see below for full details.
 

Laura and I are both Stampin' Up! Demonstrators, having been running our very successful and hugely popular all day Stampin' Sanctuary Classes locally, now coming into our 4th year, we have now decided the time is right to offer our classes by post, we often hear from people who are not local but would love to make our projects, so with that in mind here is your chance to complete our class in the comfort of your own home.

The Carousel, turns around on a lazy susan, it includes great storage for all your craft supplies, we've even included a place to pop your tombow adhesive!

You will receive everything to make the Stationery Carousel, you will just need to supply your own adhesive, paper trimmer, bone folder and scissors - just your basic tool kit really, anything you need in particular that we think you may not have we would advise you of this.


What's included:
Full detailed colour instructions with photos
Full pack of 12x12 All my Love DSP
1 x Lazy Susan
1 x pack of All My Love Cardstock 
some Linen Thread
a selection of All My Love Ribbons
1/2 pack of Heart Epoxy Droplets
2 x metal drawer handles 
and Chipboard
 
You will have lots left over to play with once you have made your Carousel. 
 
To order your kit simply send a Paypal payment of £35 to paypal.me/stampinsanctuary 
please include a note saying Class in the Post
 
or click on the button below to order your kit
 
 
the last day to order your kit is: Saturday 2nd February 2019

Your Class by Post will be posted, free of charge, by Royal Mail signed for post and 
will post week beginning Monday 18th February 2019 

Please don't hesitate to contact us if you have any questions 
 
Happy Craftin'

 Jo Blackman & Laura Mackie

SF Jan 2019 All About Love Blog Hop...

Stampin' Friends Jan 2019 - All About Love Blog Hop
 
Good afternoon and welcome to my blog today.  I am hopping with the Stampin Friends Blog Hop.  We have been tasked to make a project and a card with the theme 'All About Love'.
 
When I got my hands on the Spring/Summer catalogue, the suite which really jumped out at me was the 'All My Love' Suite, the 'Meant to Be' Stamp Set and the 'Be Mine' Stitched Framelits.  They all co-ordinate beautifully, not to mention the gorgeous DSP, ribbon and embellishments which complete the Suite.
 
I decided to create a simple clean card today (I do struggle a little with this concept!) so here it is...


I used the Artisan Textures background on my card front and used the Meant to Be dies to create an array of hearts, these dies are just beautiful and other than the background stamp, I have not used any other stamps in the making of this card.


I then make a fairly sizeable box to accompany the card, and here it is....


Again I kept the box quite simple and let the beautiful DSP and ribbon do the work for me.
 
Here are the two projects side by side.
 
 
I hope you have enjoyed my projects today.  Please continue following the hop and if you like what you see, please leave a comment, it is always nice to receive feedback.
 
Happy Stampin'
 
Jo
x
 
 
Table built using Product Table Builder by The Crafty Owl - Independent Stampin' Up! Demonstrator.

SDBH Blog Hop January...


Good morning and welcome to my first Stampin’ Dreams Blog Hop.  You are joining me here from Norfolk in the UK.

Today is a collaboration of Stampin’ Up! Demonstrators from across the Globe.  We have been set the task of creating three cards using similar products for three levels of crafter.  The Beginner - Casual - Avid.

I recently purchased the beautiful Fable Friends stamp set and thought it was a great opportunity to ink it up.

THE BEGINNER

I remember being the beginner and how daunting it was and how there are so many things to remember, what goes with what, why, where etc.  Sometimes I think we forget what it is like to be the beginner and having the courage to walk through the door in the first place!  So for my beginner card I simply stamped my chosen stamp in Memento black ink and lightly coloured my image using the Watercolour Pencils in a cross hatching motion.  This is a great technique to familiarise yourself with the pencils and the level of pressure to be applied to create some shadow and movement of the image. I stamped my greeting in the same ink and added a gem to finish.

Here is my ‘beginner’ card...


THE CASUAL

The casual stamper now has some experience and has dabbled around a bit (quite a bit!) but now wants to develop the skills.  For my casual crafter I added some Designer Series Paper to a separate matted layer and added some ribbon and a bow.  I then stamped my image on some separate card but this time I blended the coloured sections using a Blender Pen.  Blender Pens are a great introduction to watercolouring without the need for water.  The liquid inside the brush tip pens blend the colours smoothly and evenly with little effort.  I then cut out my image before adhering it to my card front.  I added a few gems to finish.

Here is my ‘casual’ card...


THE AVID

This is the category I would put myself in, having crafted most of my life and taught for too many years to mention!  By now you have bought all products known to man and then discovered Stampin’ Up! Products are the best and you simply NEED everything!  For this card I stamped my image three times in the same way but this time in Staz-on Ink.  I then coloured my images and used a watercolour brush and some water to blend my colours before cutting them out and decoupage them together using 3d foam.  I created my background by cutting a square from an embossed panel using the Lace embossing folder, I then cut out a square from the card front itself before cutting a scalloped border for the front and sticking a piece of DSP to the inside of the card.  I layered the pieces together, cut three banners from card, DSP and a stamped greeting before adding some linen thread and my decoupaged bunny.

Here is my ‘avid’ card...


Here are some pictures of them together.


I hope you have enjoyed my projects today.  Please continue through the Hop to see some amazing projects and ideas to inspire you.

Thank you for joining me.

Happy Stampin’

Jo
x